
ฟรีและดีที่สุด คอร์สอบรม Arduino + NodeMCU
ทำเพื่อแบ่งปัน ห้ามนำไปจำหน่าย หรือเก็บเงินค่าเรียน !!!


AllNewStep รับประกันคุณภาพทุกชิ้น วันจันทร์-ศุกร์แจ้งชำระสินค้าก่อน 14.00 จัดส่งทันทีวันนี้ค่ะ
กรุงเทพ /ภาคกลาง ได้พรุ่งนี้
*** สินค้าทุกชิ้น ถ้าสามารถทำรายการสั่งซื้อได้ แสดงว่ามีครบทุกรายการค่ะ ***
ผมต้องการ ที่จะสร้าง password แบบอิสระ แล้วเก็บบันทึกลง eeprom ช่วยดูโค๊ดให้หน่อยครับ

#include <Password.h>
#include <EEPROM.h>
byte pass1;
byte pass2;
byte pass3;
byte pass4;
int i=0;
char newPassword[5]= " ";
Password password = Password(newPassword);
byte currentLength = 0;
void setup()
{
Serial.begin(9600);
//Serial.print("Enter password = ");
pass1 = EEPROM.read(0);
delay(100);
pass2 = EEPROM.read(1);
delay(100);
pass3 = EEPROM.read(2);
delay(100);
pass4 = EEPROM.read(3);
delay(100);
for (int ii=0; ii<4; ii++)
{
newPassword[ii]=EEPROM.read(0+ii);
delay(5);
Serial.print(newPassword[ii],'byte');
}
}
void loop()
{
if (Serial.available())
{
char input = Serial.read();
switch (input)
{
case '*': //reset password
password.reset();
currentLength = 0;
Serial.println("\tPassword is reset!");
break;
case '#': //evaluate password
if (password.evaluate())
{
Serial.println("\tOK Password Correct");
password.reset();
currentLength = 0;
}
else
{
Serial.println("\tNO Password Did Not");
password.reset();
currentLength = 0;
Serial.println("\tPassword is reset!");
}
break;
case 'n': // New Pasword
delay(100);
{
EEPROM.write(0,'2');
delay(100);
EEPROM.write(1,'2');
delay(100);
EEPROM.write(2,'2');
delay(100);
EEPROM.write(3,'2');
delay(100);
break;
default:
password << input;
currentLength++;
}
}
}
}

ลองทำแยกส่วนกันก่อนครับ
1. โคดส่วนรับ/เช็ค รหัสผ่าน ตามที่ต้องการโดยยังไม่ต้องบันทึกข้อมูล
2. โคดส่วน ของการ เขียน/อ่าน/ลบ EEPROM มีตัวอย่างใน Arduino IDE เรียบร้อยแล้ว รันได้เลย ลองศึกษาดูครับ
https://www.arduino.cc/en/Reference/EEPROM
ผมลองเขียน รับ/เช็ค password แล้วครับ เดียวจะลองเพิ่ม eeprom เข้าไป
#include <Password.h>
Password password = ("1234") ;
byte pass = 0;
void setup() {
Serial.begin(9600);
Serial.println("passwordshow");
}
void loop() {
if(Serial.available()){
char input = Serial.read();
switch (input){
case '#':
password.reset();
pass = 0;
Serial.println("\tPassword is reset");
break;
case '*':
if(password.evaluate()){
Serial.println ("\tPassword ok");
password.reset();}
else{
Serial.println("\tPassword no");
password.reset();
break;
default:
password << input;
pass++;
Serial.print("Enter pasword");
for(byte i=0; i<pass; i++){
Serial.print('*');
}
Serial.println();
}
//Print some feedback.
} } }
พี่ึคำ ถ้าเขียนโค๊ดให้ รับค่าจาก Serial moniter ต้องเขียนยังไง
Serial.write(); แบบนี้มั้ยครับ
การรับค่าจาก serial monitor จาก keyboard เป็นการติดต่อแบบ serial
ตามโคดตัวอย่างนี้ ลองก็อป รัน ปรับแก้ ดูครับ
https://www.arduino.cc/en/Serial/Read
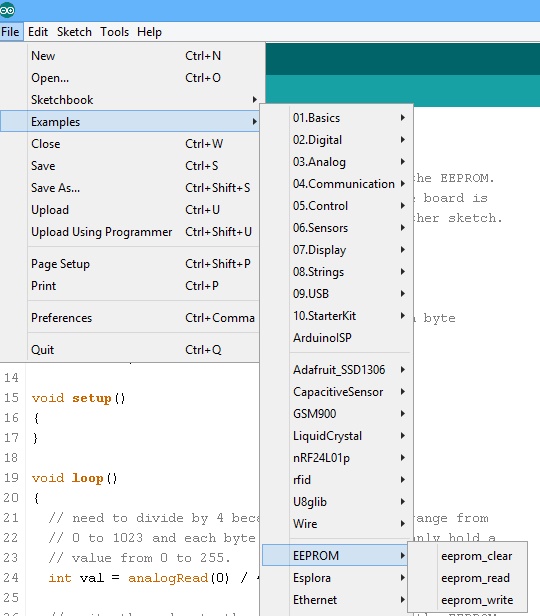
ผมไม่สามารถใช้งาน EEPROM ได้คับ มันฟ้อง error ตลอดคับ
อันนี้คับ ใช้กับ R3
/*
* EEPROM Read
*
* Reads the value of each byte of the EEPROM and prints it
* to the computer.
* This example code is in the public domain.
*/
#include <EEPROM.h>
// start reading from the first byte (address 0) of the EEPROM
int address = 0;
byte value;
void setup()
{
// initialize serial and wait for port to open:
Serial.begin(9600);
while (!Serial) {
; // wait for serial port to connect. Needed for Leonardo only
}
}
void loop()
{
// read a byte from the current address of the EEPROM
value = EEPROM.read(address);
Serial.print(address);
Serial.print("\t");
Serial.print(value, DEC);
Serial.println();
/***
Advance to the next address, when at the end restart at the beginning.
Larger AVR processors have larger EEPROM sizes, E.g:
- Arduno Duemilanove: 512b EEPROM storage.
- Arduino Uno: 1kb EEPROM storage.
- Arduino Mega: 4kb EEPROM storage.
Rather than hard-coding the length, you should use the pre-provided length function.
This will make your code portable to all AVR processors.
***/
address = address + 1;
if(address == EEPROM.length())
address = 0;
/***
As the EEPROM sizes are powers of two, wrapping (preventing overflow) of an
EEPROM address is also doable by a bitwise and of the length - 1.
++address &= EEPROM.length() - 1;
***/
delay(500);
}


 ArduinoAll ขาย Arduino ซื้อ Arduino ทุกอย่าง เปลี่ยนชื่อเป็น AllNewStep
 ธ.กรุงไทย
